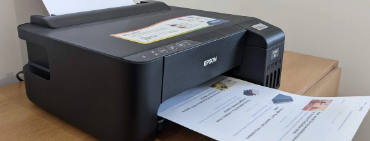
How to Fix Your Printer Without Calling a Technician
If you are a teacher who uses a printer frequently, you may have encountered some common problems such as paper jams, low ink levels, or error messages. Sometimes, these issues can be easily resolved by following some simple steps. Other times, you may need to call a technician for help. But before you do that, you may want to try some DIY solutions that could save you time and money.

One of the most annoying problems that can affect your printer is when it stops printing and shows a message that says “Service Required” or “Parts inside your printer are at the end of their service life”. This usually means that your printer has consumed its ink pad or waste ink pad, which are parts that absorb the excess ink from the print head. When these pads are full, they can cause the printer to malfunction or leak ink.
Fortunately, there is a way to reset your printer and make it work again. All you need is a computer, an internet connection, and a USB cable. Here are the steps to follow:
- Find out the model number of your printer. You can usually find it on the front, back, or bottom of the printer.
- Go to a website that offers free or paid resetter software for your printer model. For example, you can visit this site and search for your printer model.
- Download the appropriate resetter software for your printer and save it on your computer.
- Run the resetter software and follow the instructions on the screen. You may need to connect your printer to your computer using a USB cable and turn it on.
- Select the option to reset the ink pad or waste ink pad counter. The software will send a command to your printer and reset the counter to zero.
- Turn off your printer and disconnect it from your computer. Wait for a few seconds and then turn it on again.
- Try printing a test page to see if your printer works normally. If it does, congratulations! You have successfully fixed your printer without calling a technician.
However, resetting your printer is not a permanent solution. It only delays the problem until the ink pad or waste ink pad becomes full again. Eventually, you will need to replace these parts or buy a new printer. Therefore, you should only use this method as a last resort and not as a regular practice.
Some other things that you can do before calling a technician are:
- Check the power cord and the USB cable for any damage or loose connections.
- Make sure that your printer has enough paper and ink. Replace any empty or low cartridges with new ones.
- Clean the print head and the rollers using a soft cloth and some distilled water. Do not use alcohol or other solvents as they may damage the printer.
- Update the printer driver and the firmware from the manufacturer’s website. This can help fix some compatibility or performance issues.
- Troubleshoot the printer using the built-in tools or the online support from the manufacturer. You can usually access these options from the printer’s menu or the computer’s control panel.
If none of these methods work, then you may need to call a technician for assistance. However, before you do that, you should compare the cost of the repair with the cost of a new printer. Sometimes, it may be more economical to buy a new printer than to fix an old one.
We hope that this blog post has helped you learn how to fix your printer without calling a technician. If you have any questions or comments, please feel free to leave them below. Happy printing!
